Shop by:
Feeder Style
Installation
Miscellaneous

Hurley Byrd's Festival of Feeders
Pick Your Exact Feeder Exclusively on eBay

A Hurley Byrd How-To:
Installing a 4x4 Post for a Large Pole Mounted Bird Feeder
Regarding our large pole mounted bird feeders, most of the questions we receive pertain to their
installation. What size pole, how high, etc...? In this Hurley-Byrd How-To article, I’m adding a new feeder
to my own yard and am going to show you how to install a 4x4 post and mount our feeders correctly.
By: Peter Hurley, Owner of Hurley Byrd
To Begin With
To do this, sit down at your chosen spot in the home and look toward the feeder’s desired location. What you are looking for is the vertical height (ground up) of your horizontal view (eye level.) Meaning, if the height of your level view measured at the post’s location is 5 feet, 8 feet, 12 feet, etc..., this is the maximum height of the post. To be even more discerning, the top of the post should be two inches less than this height to accommodate the feeder itself. The idea is to set the feeder’s base at exactly eye level height since most of your birds will be feeding on the feeder’s base. This will provide the best view of as many birds as possible while they feed. If the feeder is set too high, you are looking up at the feeder and the feeder’s base blocks your view. If it’s too low, the roof will block the view. Eye level at the feeder’s base is what you are looking for.
Now that the perfect location has been chosen and you know which height you wish to set the post, it’s time to go to work. As a general rule, bury 25% or 30% of your post. An 8’ post needs a minimum of 2’ in the ground, a 12’ post 3’, etc... Beyond this, the size of the feeder and your soil type must be taken into consideration. Our largest feeder with its mount and matching seed catcher tray weight around 25 pounds. This same feeder holds approximately 30 pounds of seed giving a grand total weight of 55 pounds. But this is not the end of the equation. In areas that receive heavy snowfall, freezing rain and or high winds, these factors need to be taken considered. The same 55 pound feeding station topped with a huge amount of hard-frozen wet snow can weigh upwards of 125 pounds. Take 125 pounds and add a driving wind storm, this becomes a lot of work for the soil holding the 4x4 post. If you have these types of conditions, it may be wise to cement you pole into the ground. For the rest of us around the country, we can usually get away with setting a post directly in the earth and this is how I have set my own feeding station illustrated here. If you are not completely comfortable and confident in making these decisions, contact a local contractor and have them set the post. A 125 pound feeding station falling into a house, car, person, pet, etc... can do a great harm causing personal injury or personal property damage.
The feeder I have chosen is an experimental derivative of our Extra Long Mourning Dove with a Heavy Duty Pole Mount and Matching Seed Catcher Tray. I am also testing some new all cedar mounts (compared to our hardwood mounts) for the feeder and the tray plus the tray itself is an odd size. The tray is actually shorter than usual but is extra wide. I am looking for a little more seed to fall to the ground from the ends of the feeder and wish to catch more from the front and back. My hopes are to spread the ground feeding birds to the left and right and catch even more seed from the feeder’s long sides. Let’s get back to our set up. This feeder weighs 18 pounds plus holds another 16 pounds of seed totaling 34 pounds. In our part of the country, it is rare to receive great amounts of snow and my home sets deeply in the woods and is protected from heavy winds. So, I plan to bury an 8 foot pole 24 inches and in most cases this will hold all of our feeders, less the extremely large ones. If you have a smaller feeder, less depth is required while a larger one will require more. One aspect that needs to be talked about is soil itself. The soil I’m working with is a heavy clay base soil that holds poles very well. If you have a soft loamy or sandy soil, you will need to bury the post deeper. If the soil is a hard rocky one, less depth may be required. As noted, if you have any concerns about your soil’s holding capability, dig deeper or mount the post in concrete.
Side Note - Cementing a Post
If you are going to cement your post in place, now is the time to level your post and use scrap lumber to prop it into an exact level position. Attach four legs to the post half way up its exposed length and anchor these to the ground. Set the pole level in all directions, mix your cement and fill the hole to within 4” of ground level. This 4” top space will allow you to plant grass or flowers if so desired. Follow the cement manufacturer’s instructions precisely including their dry time schedule. Once the cement is dry, the feeding station can be set up as described below.
With the soil soaked up with water, now is the time to double check the level of the post one last time. If it is leaning one way or the other, press it back into a level position and step down hard on the replaced soil. It will not take too much effort and this is a good practice for the next few weeks as the soil settles back into place. You may wish to use your shovel and jab it down into the loose soil and continue working the post back into a level position and within a short time it will become firmly set in the ground.
To begin with, even before buying the post, you need to ask yourself a few questions. First, where do I want my new feeder? Buying a big feeder is an investment in your wildlife and we recommend placing your feeder in a location it will be viewed more than any other feeder. This could be a view from your dining room or sun porch but maybe you have a home office in which you spend a great deal of time. In my own case as shown here, I picked one of my favored views of all, straight off my home’s front deck and winter living room. Since my home is a split level, this deck is off the second story so I picked a spot near the top of a slight hill in front of the house. In doing so, I was able to use a standard 8’ pressure treated 4x4 (3 ½” x 3 ½”) post that can be purchased at any lumber yard to erect my feeder. Once you have chosen the feeder’s location, it’s time to figure out how high the feeder should be set. Most people set their feeders about five feet off the
ground. This makes filling them easy and often times works perfectly. But we have customer who have feeders 12 feet up so they can view them from a second story window or to ward off encroaching wildlife. With all things consider, we recommend setting a large feeder’s height in such a way you receive the best view of your birds.
When I chose the location of my new feeder, I also took into consideration the yard’s landscaping. As the photo to the right shows, the new location has a shrub like oak tree. This shrub is actually an old dead oak tree that was cut down due to disease. The suckers it continually produces grow for a few years then die, effectively perpetuating a hardwood shrub and the birds love it as an immediate staging area. Not shown in the photos but further to the right is a wildly grown tangle of shrubs, brambles, etc... which I’ve encouraged for years. It provides the perfect protective habitat and in
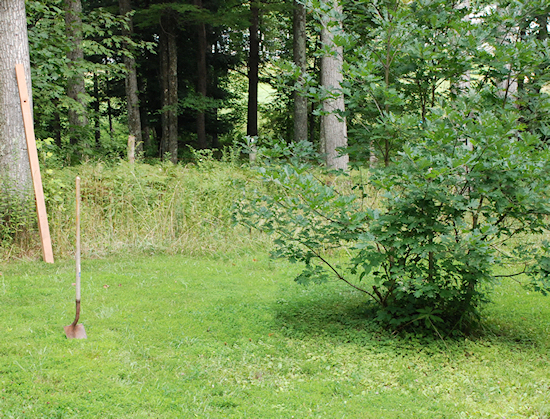
the wintertime, many birds use this tangle for safety and as a prestaging area to all my feeders. It is not uncommon to see 12-20 pairs of Cardinals spending their day resting and feeding from this spot. Try incorporating as many types of permanent flora into your feeding station and you will positively be rewarded with extra bird feeding action.
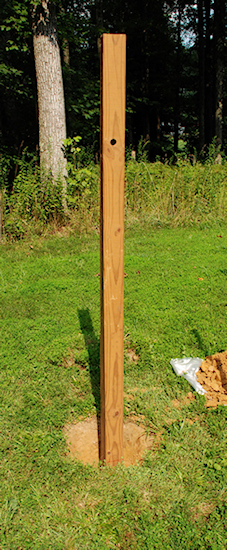
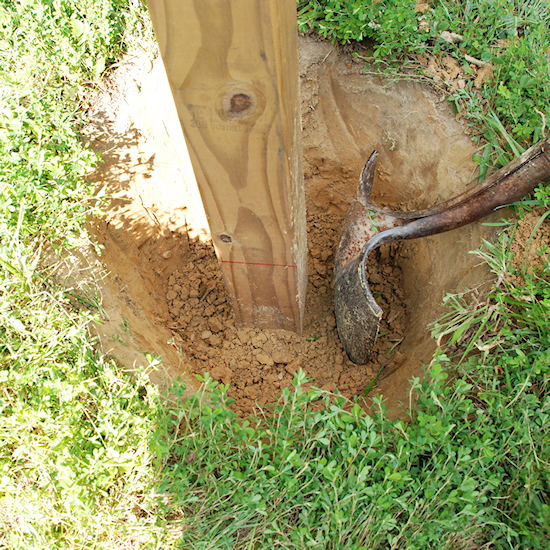
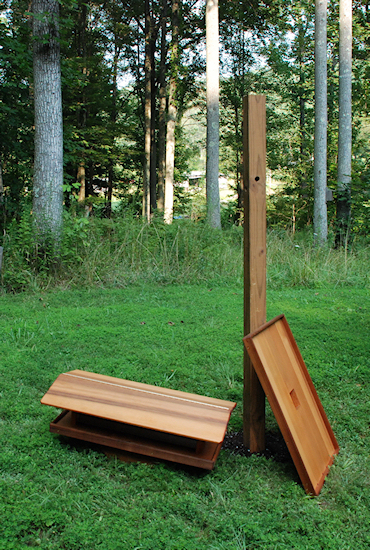
Upon purchasing a post and prior to installation, you can paint, seal or manipulate the pole as desired. As for my pole shown here, I routed the edges, bored holes for hanging arms and sealed it with a natural cedar colored penetrating oil stain. Prior to sealing the post though, I placed a red line at 24” in an effort to simplify my installation by insuring it is set at the proper depth and to have a visual aid indicating the pole remains at this depth. Most importantly, the addition of more soil will be known if the red line appears.
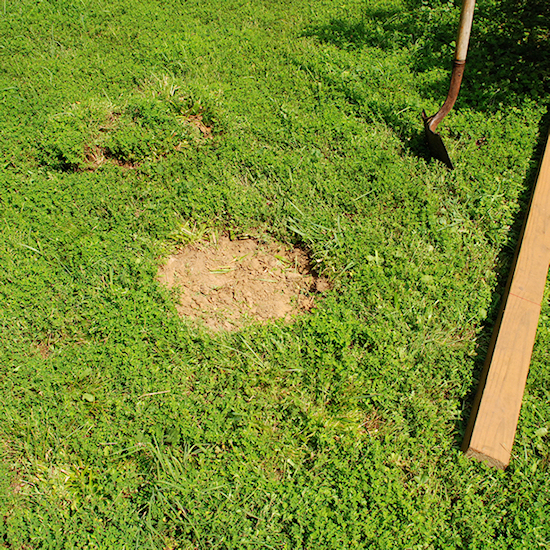
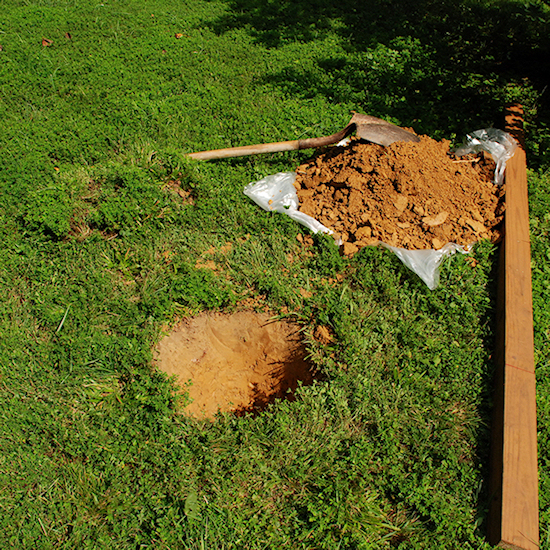
With your new post ready for action, let’s go to work. At the exact spot the pole is to be placed, I dug out the sod in a 20” diameter circle as shown to the right and set it aside for replacement later. Once the sod is removed it’s time to start digging for depth. In reality, this is the hardest part of the whole job but the quickest part to be finished. The idea is to dig a slightly tapered hole with a flat bottom diameter of about 8”, hence the 20” diameter at top.
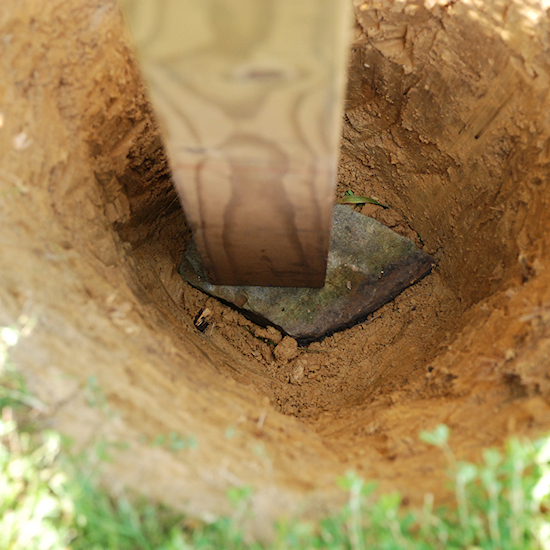
Set a tarp or piece of plastic on the ground to place the dug earth upon to protect your lawn and make clean up a bit easier. As shown below I finished digging the hole and it only took about 10 minutes. Take your time and clean the hole very well. Once done, I went and found a thick flat rock which will now be placed in the bottom of the hole. This is done to give the post a firm strong foundation so it won’t sink. Since the rock is 2” thick, I dug out an extra 2” of depth and set the rock in the bottom. Take your post and tap it against the rock several times to seat the rock and make sure the post’s bottom sets squarely on top of the rock.

As for most of us, we’re going to backfill the hole with the loose dirt. Stand the post on its rock foundation and hold it approximately straight up and down. MAKE SURE the post is set so one of its flat sides faces your desired viewing area. In doing so, your feeder will sit with a long side facing your home. If you desire the feeder to set at a 45 degree angle to your viewing area, set the post so one of its corners faces the house.
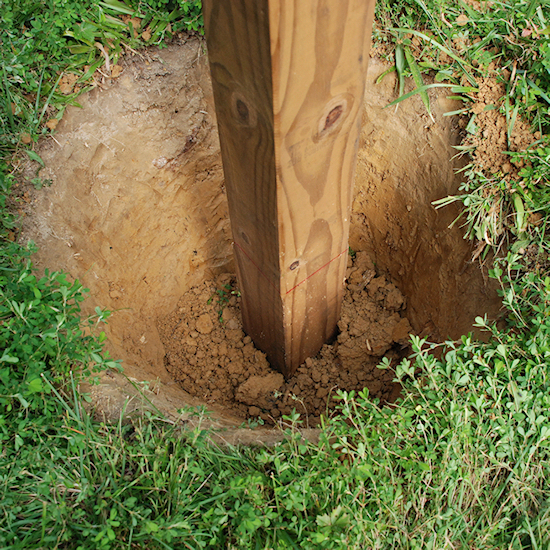
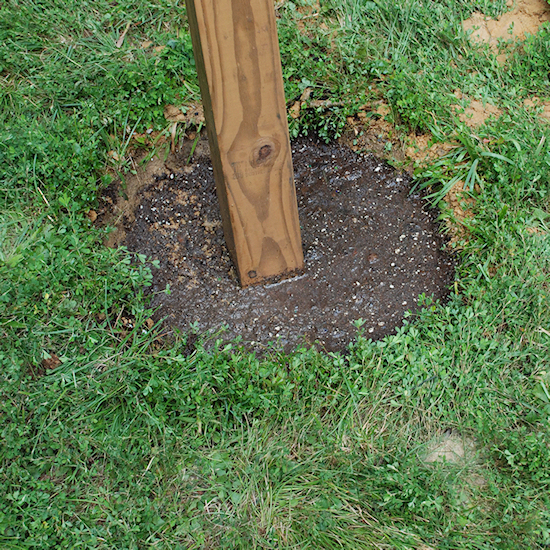
As shown to the right, loosely backfill the hole about 1/2 full so the post will stand on its own. Tamp down the loose earth and add a little more dirt, tamp again and repeat until the post stands firmly in place but still moveable. The more you tamp the earth, the stronger its immediate holding ability will be. Adding a VERY small amount of
water to dry soil will remove air pockets and help compact the soil. Use very little water to slightly moisten the soil only. Do not create a muddy condition as this will hamper the installation.
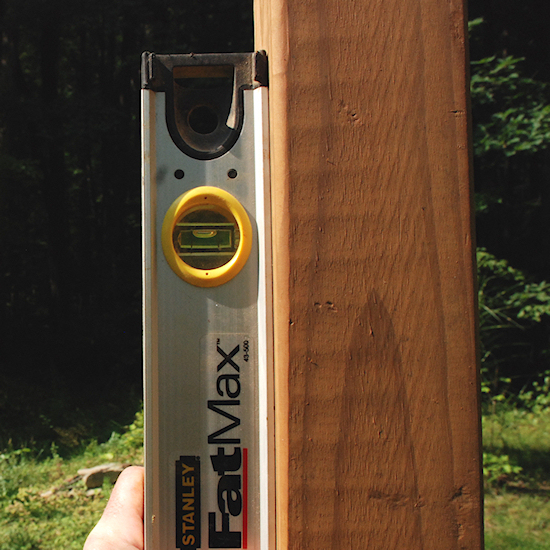
With the post firmly planted but slightly moveable, it is time to level it into its final position. Using a carpenter’s level as shown to the left, make sure the post is perfectly level front to back and side to side. As you continue filling in the hole, check to make sure level is retained. Continue backfilling by adding more dirt and tamping, adding more dirt and tamping until the hole is nearly full. If you desire to replace the sod, heap up the soil around the pole as high as possible while tamping it into place and then set the sod on top. In the days/weeks to follow, the soil will settle back to ground level. You may need to pull the sod up and add or remove soil once the hole has completely settled.
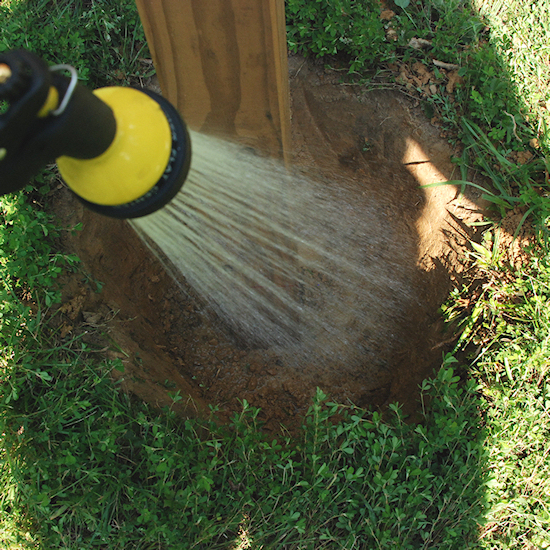
In my case, I am preparing the soil in this area for planting a few climbing vines next spring and have discarded the sod. I left the last few inches of depth for a high quality garden soil and will continue to add more as the earth settles around the pole. By next spring, I’ll have a deep, rich pocket of garden soil ready for whatever plantings I desire. Here at the end, the last thing to do is soak the ground. This will help flow soil into all the little air pockets and will settle the earth more quickly. You may wish to soak the ground each day for a week or so to speed up the settling process and keep your sod moist.
Now that your post is set, it’s time to put up the feeder and its tray. Our Mourning Dove series feeders arrive partially disassembled for shipping purposes. The roof needs to be screwed into place and the mounts for the feeder and seed tray require attaching. As always, all attaching hardware is supplied, including the screws for securing the feeder and tray to the post. Once assembled, bring the feeder and tray to your newly erected post. Slip the tray over the top of the post, slide it down until it sets on the ground and set the feeder on top of the post. The mounts of
each component have a little extra play built into them allowing you to level each item side to side a small degree. Stand back and look at the feeder. If it needs leveling, level it and secure with provided screws. Slide the seed tray back up to the underside of the feeder and secure. Keep in mind, the tray can be attached anywhere along the post you may desire.
For me, I wanted it snug up against the feeder’s mount to create a visual effect that appears as one large feeding station but the tray can be placed further down the post allowing more room for your birds to move and feed. This is a personal choice you can experiment with it over time. Every feeding situation is different and this flexibility produces different results with different birds.
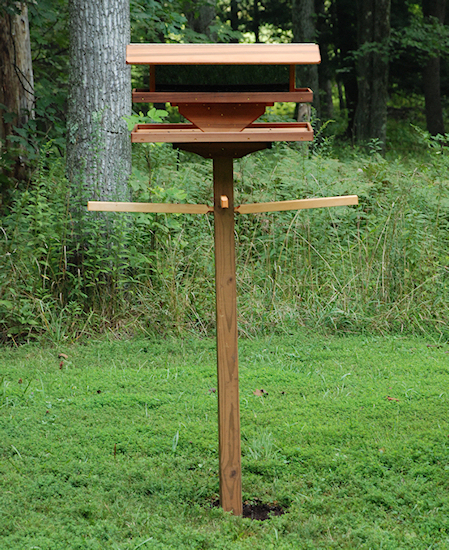
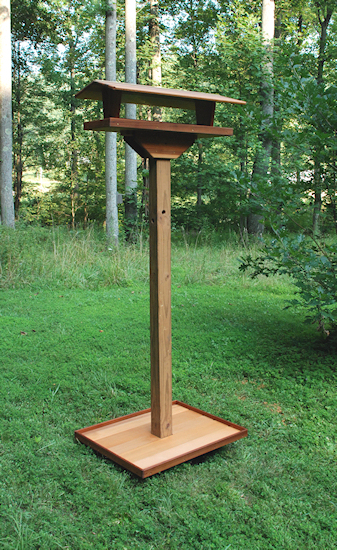
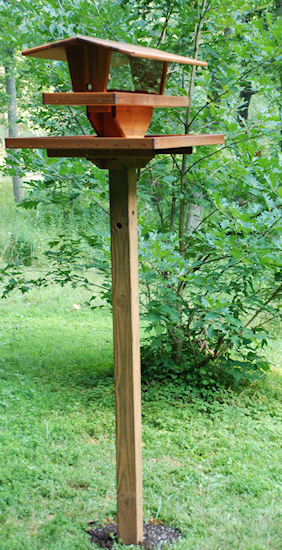
As seen in the final photo to the right taken from my deck, the feeder’s base is nearly level with my view and I have added arms to the post for future use holding more feeders and also to string up next year’s climbing plants. There is an array of miscellaneous items on the market allowing you to create a widely diverse bird haven.
Now, you are done. Fill the feeder, stand back and enjoy your efforts in setting up the finest feeding station available. For me, everything was completed in an afternoon and the next morning while enjoying a cup of coffee, I enjoyed watching all my feathered friends visit the new feeder for the first time. It was a great and satisfying sunrise. I guarantee yours will too.
Download a Free PDF Copy. Click Here - 1.5 megs
A Hurley Byrd How-To:
Installing a 4x4 Post for a Large Pole Mounted Bird Feeder
Regarding our large pole mounted bird feeders, most of the questions we receive pertain to their
installation. What size pole, how high, etc...? In this Hurley-Byrd How-To article, I’m adding a new feeder
to my own yard and am going to show you how to install a 4x4 post and mount our feeders correctly.
By: Peter Hurley, Owner of Hurley Byrd
All Rights within this website and its related
products are Copyrighted and Reserved by:
Hurley Byrd Wildlife Feeders
462 Williams Crossroads Way
Fairmont, West Virginia 26554
Telephone: 877-363-0199
© 2002 - 2019